一、WePY介绍
WePY 是 腾讯 参考了Vue 等框架对原生小程序进行再次封装的框架,更贴近于 MVVM 架构模式, 并支持ES6/7的一些新特性。
二、WePY 使用
1、WePY的安装或更新都通过npm进行:
|
0 1 2 3 4 5 6 |
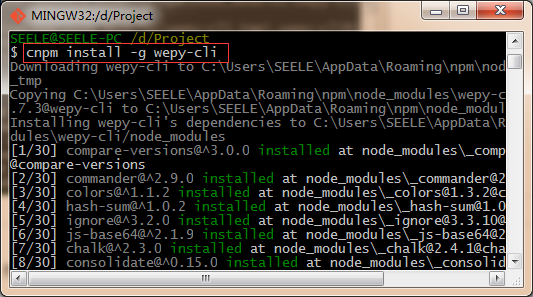
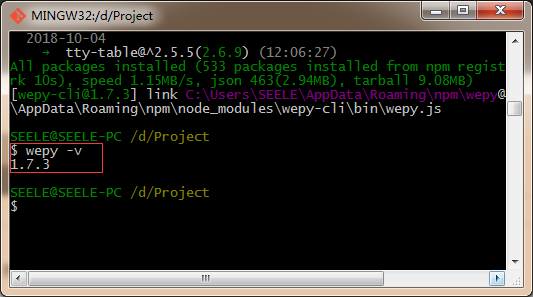
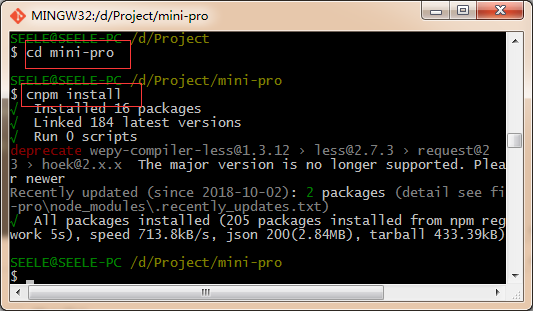
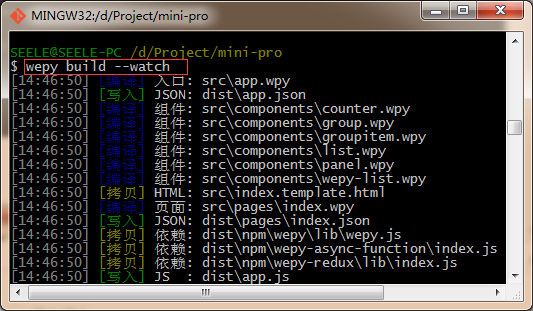
npm install -g wepy-cli //全局安装或更新WePY命令行工具(wepy脚手架): wepy-cli wepy -v //查看wepy-cli版本 wepy init standard <projectName> //新建wepy小程序项目,1.7.0之前的版本使用:wepy new myproject wepy list //查看项目模板 cd <projectName> //切换至项目目录 npm install //安装依赖 wepy build --watch //开启实时编译 |
git base here:
(1)全局安装或更新 wepy-cli:
(2)查看 wepy-cli 版本:
(3)创建 wepy 小程序项目:
(4)切换至项目目录,安装依赖:
(5)开启实时编译
2、代码高亮WebStorm/PhpStorm(其他工具参见:wepy官网代码高亮)
(1)打开Settings,搜索Plugins,搜索Vue.js插件并安装。
(2) 打开Settings,搜索File Types,找到Vue.js Template,在Registered Patterns添加*.wpy,即可高亮。
3、代码优化
(1)代码规范
- wepy标签和原生一样
- 自定义组件命名应避开:原生组件名(
input、button、view、repeat等)、WePY的辅助标签<repeat> - 变量/方法名尽量使用驼峰式命名,避免使用
$开头($开头的标识符是WePY内建属性/方法,可在js中以this.的方式直接使用,具体请参考API文档) - app、pages、components文件名的后缀为
.wpy,外链的文件可以是其它后缀。 具体请参考wpy文件说明。 - 支持ES6/7的一些新特性,框架在ES6(ECMAScript 6)下开发(默认使用babel编译),因此也需要使用ES6开发小程序,ES6中有大量的语法糖可以让我们的代码更加简洁高效。
- wepy继承了wx对象的方法,建议在wepy框架开发中不要用到wx对象的方法,虽然运行时效果是一样,但是打包时会cli报错(wepy中没有wx对象)wepy中组件中使用的是class,vue中使用的的是对象。
(2)数据绑定
小程序页面渲染层和JS逻辑层分开的,setData操作实际就是JS逻辑层与页面渲染层之间的通信,在同一次运行周期内多次执行setData操作时,通信的次数是一次还是多次取决于API本身的设计。WePY使用脏数据检查对setData进行封装,在函数运行周期结束时执行脏数据检查,一来可以不用关心页面多次setData是否会有性能上的问题,二来可以更加简洁去修改数据实现绑定,不用重复去写setData方法。
|
0 1 2 3 4 5 6 7 8 9 10 11 12 13 14 |
//原生小程序 this.setData({title: 'this is title'});//通过Page提供的setData方法来绑定数据 //wepy this.title = 'this is title'; //wepy 在异步函数中更新数据的时候,必须手动调用$apply方法,才会触发脏数据检查流程的运行 setTimeout(() => { this.title = 'this is title'; this.$apply(); }, 3000) //保留setData方法,但不建议使用setData执行绑定,修复传入undefined的bug,并且修改入参支持: this.setData(target, value) this.setData(object) |
(3)事件绑定以及传参优化
|
0 1 2 3 4 5 |
<view @tap="click"></view> // 原 bindtap="click"(省略了.default后缀 )绑定小程序冒泡型事件 <view @tap.stop="click"></view> // 原catchtap="click" 绑定小程序捕获型事件,如catchtap <view @tap.capture="click"></view> // 原 capture-bind:tap="click" <view @tap.capture.stop="click"></view> // 原 capture-catch:tap="click" <!--事件传参--> <view @tap="click({{index}})"></view> // 原bindtap="click" data-index={{index}} |
(4)框架默认对小程序提供的API全都进行了 Promise 处理,甚至可以直接使用async/await等新特性进行开发,同时修复了一些原生API的缺陷(如:wx.request的并发问题等)
|
0 1 2 3 4 5 6 7 8 9 10 11 12 13 14 15 16 |
// 原生代码: wx.request({ url: 'xxx', success: function (data) { console.log(data); } }); // WePY 使用方式, 需要开启 Promise 支持,参考开发规范章节 wepy.request('xxxx').then((d) => console.log(d)); // async/await 的使用方式, 需要开启 Promise 和 async/await 支持,参考 WIKI async function request () { let d = await wepy.request('xxxxx'); console.log(d); } |
(5)computed 计算属性computed计算属性(类型: { [key: string]: Function }),是一个有返回值的函数,可直接被当作绑定数据来使用,类似于data属性。需要注意的是,只要是组件中有任何数据发生了改变,那么所有计算属性就都会被重新计算。
|
0 1 2 3 4 5 6 7 8 9 |
data = { a: 1 } // 计算属性aPlus,在脚本中可通过this.aPlus来引用,在模板中可通过{{ aPlus }}来插值 computed = { aPlus () { return this.a + 1 } } |
(6)watcher 监听器
通过监听器watcher(类型: { [key: string]: Function })能够监听到任何属性的更新。监听器适用于当属性改变时需要进行某些额外处理的情形。
|
0 1 2 3 4 5 6 7 8 9 10 11 12 13 14 15 16 17 18 |
data = { num: 1 } // 监听器函数名必须跟需要被监听的data对象中的属性num同名, // 其参数中的newValue为属性改变后的新值,oldValue为改变前的旧值 watch = { num (newValue, oldValue) { console.log(`num value: ${oldValue} -> ${newValue}`) } } // 每当被监听的属性num改变一次,对应的同名监听器函数num()就被自动调用执行一次 onLoad () { setInterval(() => { this.num++; this.$apply(); }, 1000) } |
(7)WXS (WeiXin Script)
WePY 从1.7.x 版本开始支持 wxs 语法,但语法与原生 wxs 稍有出入
a.wxs是基于原生的wxs去实现的,只是通过编译把现在的语法编译为原生语法
②wxs必须是外链文件。并且后缀为.wxs
③wxs引入后只能在template中使用,不能在script中使用
|
0 1 2 3 4 5 6 7 8 9 10 11 12 13 14 15 16 17 18 19 20 21 22 23 24 25 26 27 28 29 30 31 32 33 34 35 36 37 38 39 40 41 |
/** project └── src ├── wxs | └── mywxs.wxs wxs 文件 ├── pages | └── index.wpy 页面 └──app.wpy **/ // mywxs.wxs module.exports = { text: 'This is from wxs', filter: function (num) { return num.toFixed(2); } }; // index.wpy <template> <text>{{m1.text}}</text> <text>{{m1.filter(num)}}</text> </template> <script> import wepy from 'wepy'; import mywxs from '../wxs/mywxs.wxs'; export default class Index extends wepy.page { data = { num: 10 }; wxs = { m1: mywxs } }; </script> |
(8)interceptor 拦截器
可以使用WePY提供的全局拦截器对原生API的请求进行拦截。具体方法是配置API的config、fail、success、complete回调函数。参考示例:
|
0 1 2 3 4 5 6 7 8 9 10 11 12 13 14 15 16 17 18 19 20 21 22 23 24 25 26 27 28 29 30 31 32 33 34 35 36 37 38 |
import wepy from 'wepy'; export default class extends wepy.app { constructor () { // this is not allowed before super() super(); // 拦截request请求 this.intercept('request', { // 发出请求时的回调函数 config (p) { // 对所有request请求中的OBJECT参数对象统一附加时间戳属性 p.timestamp = +new Date(); console.log('config request: ', p); // 必须返回OBJECT参数对象,否则无法发送请求到服务端 return p; }, // 请求成功后的回调函数 success (p) { // 可以在这里对收到的响应数据对象进行加工处理 console.log('request success: ', p); // 必须返回响应数据对象,否则后续无法对响应数据进行处理 return p; }, //请求失败后的回调函数 fail (p) { console.log('request fail: ', p); // 必须返回响应数据对象,否则后续无法对响应数据进行处理 return p; }, // 请求完成时的回调函数(请求成功或失败都会被执行) complete (p) { console.log('request complete: ', p); } }); } } |
三、WePY项目的目录结构
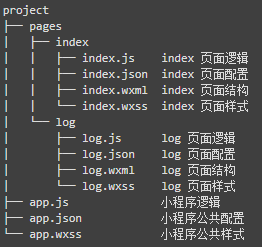
dist目录为WePY通过build指令生成的目录,除额外增加的npm目录外,其目录结构与原生小程序的目录结构类似。
原生小程序:app(app.js、app.json、app.wxss),page(page.js、page.json、page.wxml、page.wxss),文件必须同名。WePY中则使用了单文件模式:app.wpy,page.wpy。
一个.wpy文件可分为三大部分,各自对应于一个标签:
- 脚本
<script>部分,又可分为两个部分:
逻辑部分,除了config对象之外的部分,对应于原生的.js文件
配置部分,即config对象,对应于原生的.json文件
- 结构
<template>部分,对应于原生的.wxml文件 - 样式
<style>部分,对应于原生的.wxss文件
|
0 1 2 3 |
<!--lang决定了其代码编译过程,src决定是否外联代码,存在src属性且有效时,会忽略内联代码--> <style lang="less" src="page1.less"></style>//lang值:css(默认)、less、scss、stylus、postcss <template lang="wxml" src="page1.wxml"></template>//lang值:wxml(默认)、xml、pug(原jade)。入口文件app.wpy不需要template,所以编译时会被忽略。 <script></script>//lang值:babel(默认、TypeScript |
主要对目录的以下几点分析(其他目录文件详解类似于https://my.oschina.net/wangnian/blog/2050375中做的分析):
1、src文件夹
(1)components组件:
组件实例继承自wepy.component类,除了不需要config配置以及页面特有的一些生命周期函数之外,其属性与页面属性大致相同:
|
0 1 2 3 4 5 6 7 8 9 10 11 12 13 14 15 16 17 18 19 |
import wepy from 'wepy'; export default class MyComponent extends wepy.component { props = {}//接收父组件传来的参数 customData = {} // 自定义数据 customFunction () {} //自定义方法 onLoad () {} // 在Page和Component共用的生命周期函数 data = {}; // 页面所需数据均需在这里声明,可用于模板数据绑定 components = {}; // 声明页面中所引用的组件,或声明组件中所引用的子组件 mixins = []; // 声明页面所引用的Mixin实例 computed = {}; // 声明计算属性(详见后文介绍) watch = {}; // 声明数据watcher(详见后文介绍) methods = {}; // 声明页面wxml中标签的事件处理函数。注意,此处只用于声明页面wxml中标签的bind、catch事件,自定义方法需以自定义方法的方式声明 events = {}; // WePY组件事件处理函数对象,存放响应组件之间通过$broadcast、$emit、$invoke所传递的事件的函数 } /** 与page不同的是component不存在: onShow () {} // 只在Page中存在的页面生命周期函数 config = {}; // 只在Page实例中存在的配置数据,对应于原生的page.json文件,类似于app.wpy中的config onReady() {} // 只在Page中存在的页面生命周期函数 **/ |
原生小程序支持js模块化,但彼此独立,业务代码与交互事件仍需在页面处理。无法实现组件化的松耦合与复用(如,模板A中绑定一个bindtap="myclick",模板B中同样绑定一样bindtap="myclick",那么就会影响同一个页面事件、数据)
WePY组件的所有业务与功能在组件本身实现,组件与组件之间彼此隔离(上述例子在WePY的组件化开发过程中,A组件只会影响到A所绑定的myclick,B也如此)
|
0 1 2 3 4 5 6 7 8 9 10 11 12 13 14 15 16 17 18 19 20 21 22 23 24 25 26 27 28 |
// 原生代码: <!-- item.wxml --> <template name="item"> <text>{{text}}</text> </template> <!-- index.wxml --> <import src="item.wxml"/> <template is="item" data="{{text: 'forbar'}}"/> <!-- index.js --> var item = require('item.js') // WePY <!-- /components/item.wpy --> <text>{{text}}</text> <!-- index.wpy --> <template> <com></com> </template> <script> import wepy from 'wepy'; import Item from '../components/item'; export default class Index extends wepy.page { components = { com: Item } } </script> |
ps,在 1.7.2-alpha4 的实验版本中提供了对原生组件的支持
a.引用组件
页面可以引入组件,而组件还可以引入子组件
|
0 1 2 3 4 5 6 7 8 9 10 11 12 13 14 15 16 17 18 19 20 21 22 23 24 25 26 27 28 29 30 31 32 33 34 35 36 37 38 |
/** project └── src ├── components | └── child.wpy ├── pages | ├── index.wpy index 页面配置、结构、样式、逻辑 | └── log.wpy log 页面配置、结构、样式、逻辑 └──app.wpy 小程序配置项(全局公共配置、公共样式、声明钩子等) **/ // index.wpy <template> <!-- 以`<script>`脚本部分中所声明的组件ID为名命名自定义标签,从而在`<template>`模板部分中插入组件 --> <view class="child1"> <child></child> </view> <view class="child2"> <!--注意:WePY中,在父组件template模板部分插入驼峰式命名的子组件标签时,不能将驼峰式命名转换成短横杆式命名(比如将childCom转换成child-com,这与Vue中不一致)--> <anotherchild></anotherchild> </view> </template> <script> import wepy from 'wepy'; //引入组件文件 import Child from '../components/child'; export default class Index extends wepy.component { //声明组件,分配组件id为child,需要注意的是,WePY中的组件都是静态组件,是以组件ID作为唯一标识的,每一个ID都对应一个组件实例,当页面引入两个相同ID的组件时,这两个组件共用同一个实例与数据,当其中一个组件数据变化时,另外一个也会一起变化。 components = { //为两个相同组件的不同实例分配不同的组件ID,从而避免数据同步变化的问题 child: Child, anotherchild: Child }; } </script> |
②循环渲染组件(1.4.6新增)
WePY 1.x 版本中,循环渲染WePY组件时(类似于通过wx:for循环渲染原生的wxml标签),必须使用WePY定义的辅助标签<repeat>
WePY组件是静态编译组件(在编译阶段编译进页面),每个组件都是唯一的一个实例,目前只提供简单的 repeat 支持(不支持在 repeat 的组件中去使用 props, computed, watch 等),因此如下:
|
0 1 2 3 4 5 6 7 8 9 10 11 12 13 14 15 16 |
<!-- 错误使用 ---> // list.wpy <view>{{test.name}}</view> // index.wpy <repeat for="{{mylist}}"> <List :test.sync="item"></List> </repeat> <!-- 推荐用法 ---> // list.wpy <repeat for="{{mylist}}"> <view>{{item.name}}</view> </repeat> // index.wpy <List :mylist.sync="mylist"></List> |
③props 传值
props传值在WePY中属于父子组件之间传值的一种机制,包括静态传值与动态传值。
静态传值为父组件向子组件传递常量数据,因此只能传递String字符串类型。
动态传值是指父组件向子组件传递动态数据内容,父子组件数据完全独立互不干扰。但可以通过使用.sync修饰符来达到父组件数据绑定至子组件的效果,也可以通过设置子组件props的twoWay: true来达到子组件数据绑定至父组件的效果。如果既使用.sync修饰符,同时子组件props中添加的twoWay: true时,就可以实现数据的双向绑定。
|
0 1 2 3 4 5 6 7 8 9 10 11 12 13 14 15 16 17 18 19 20 21 22 23 24 25 26 27 28 29 30 31 32 33 34 35 36 37 38 39 40 41 42 43 44 45 46 |
// parent.wpy <!--在父组件template模板部分所插入的子组件标签中,使用:prop属性(等价于Vue中的v-bind:prop属性)来进行动态传值--> <child :title="parentTitle" :syncTitle.sync="parentTitle" :twoWayTitle="parentTitle"></child> <!--通过使用.sync修饰符来达到父组件数据绑定至子组件的效果--> <script> data = { parentTitle: 'p-title' }; </script> // child.wpy <script> props = { // 静态传值 title: String, // 父向子单向动态传值 syncTitle: { type: String, default: 'null' }, // 双向绑定 twoWayTitle: { type: String, default: 'nothing', twoWay: true//twoWay: true(默认false)来达到子组件数据绑定至父组件的效果,如果同时使用.sync修饰符,就可以实现双向绑定 } }; onLoad () { console.log(this.title); // p-title console.log(this.syncTitle); // p-title console.log(this.twoWayTitle); // p-title this.title = 'c-title'; console.log(this.$parent.parentTitle); // p-title. this.twoWayTitle = 'two-way-title'; this.$apply(); console.log(this.$parent.parentTitle); // two-way-title. --- twoWay为true时,子组件props中的属性值改变时,会同时改变父组件对应的值 this.$parent.parentTitle = 'p-title-changed'; this.$parent.$apply(); console.log(this.title); // 'c-title'; console.log(this.syncTitle); // 'p-title-changed' --- 有.sync修饰符的props属性值,当在父组件中改变时,会同时改变子组件对应的值。 } </script> |
④组件通信与交互
wepy.component基类提供$broadcast、$emit、$invoke三个方法用于组件之间的通信和交互:
$broadcast
$broadcast事件是由父组件发起,所有子组件都会收到此广播事件,除非事件被手动取消。事件广播的顺序为广度优先搜索顺序
$emit
$emit与$broadcast正好相反,组件发起事件后所有祖先组件会依次接收到$emit事件
|
0 1 2 3 4 5 6 7 8 9 10 11 12 13 14 15 16 17 18 19 20 |
//子组件: this.$emit('some-event', 1, 2, 3, 4); //父组件: import wepy from 'wepy' export default class Com extends wepy.component { components = {}; data = {}; methods = {}; // events对象中所声明的函数为用于监听组件之间的通信与交互事件的事件处理函数 events = { 'some-event': (p1, p2, p3, $event) => { console.log(`${this.$name} receive ${$event.name} from ${$event.source.$name}`); } }; // Other properties } |
$invoke
$invoke是一个页面/组件对另一个组件中的方法的直接调用,通过传入组件路径找到相应的组件,然后再调用其方法。
|
0 1 2 |
this.$invoke('ComA', 'someMethod', 'someArgs');//在页面Page_Index中调用组件ComA的某个方法 this.$invoke('./../ComB/ComG', 'someMethod', 'someArgs');//在组件ComA中调用组件ComG的某个方法 //只能在methods中使用 在周期函数使用会报错 |
⑤组件自定义事件处理函数(.user事件后缀,1.4.8新增)
示例如下(注意,如果用了自定义事件,则events中对应的监听函数不会再执行):
|
0 1 2 3 4 5 6 7 8 9 10 11 12 13 14 15 16 17 18 19 20 21 22 23 24 25 26 27 28 29 30 31 32 33 34 35 36 37 38 39 40 |
// index.wpy <template> <child @childFn.user="parentFn"></child> </template> <script> import wepy from 'wepy' import Child from '../components/child' export default class Index extends wepy.page { components = { child: Child } methods = { parentFn (num, evt) { console.log('parent received emit event, number is: ' + num) } } } </script> // child.wpy <template> <view @tap="tap">Click me</view> </template> <script> import wepy from 'wepy' export default class Child extends wepy.component { methods = { tap () { console.log('child is clicked') this.$emit('childFn', 100) } } } </script> |
⑥slot 组件内容分发插槽
WePY中的slot插槽作为内容分发标签的空间占位标签,便于在父组件中通过对相当于扩展板卡的内容分发标签的“插拔”,更为灵活、方便地对子组件进行内容分发。
注意,父组件中的标签必须有slot属性,且值为子组件中对应的slot名,这样父组件内容分发标签中的内容(即便没有内容,子组件插槽中的默认内容也不会显示出来,只有删除了父组件中对应的内容分发标签,才能显示出来)会覆盖掉子组件对应插槽中的默认内容
|
0 1 2 3 4 5 6 7 8 9 10 11 12 |
//首先在子组件template模板部分中声明slot标签作为内容插槽,同时必须在其name属性中指定插槽名称,还可设置默认的标签内容 <view class="panel"> <slot name="title">默认标题</slot> <slot name="content">默认内容</slot> </view> //然后在引入了该带有插槽的子组件的父组件template模板部分中声明用于“插拔”的内容分发标签 <panel> <view slot="title">新的标题</view> <view slot="content"> <text>新的内容</text> </view> </panel> |
eg:message-com.wpy:
|
0 1 2 3 4 5 6 7 8 9 10 11 12 13 14 15 16 17 18 19 20 21 22 23 24 25 26 27 28 29 30 31 32 33 34 35 36 37 38 39 40 41 42 43 |
<template> <!-- 1.4.6新增:循环渲染时(类似于原生的wx:for),必须使用WePY定义的辅助标签"<repeat>" --> <repeat for="{{messageList}}" index="index" item="message"> <navigator url="/pages/topicDetail?topicId={{message.busiId}}"> <view class="msgList"> <!-- "<text selectable='true'>" 使文字可选--> <text selectable='true'>{{message.content}}</text> <view style="text-align: right;"> <text style="color: rgb(202,202,202);">{{message.createTime}}</text> </view> </view> </navigator> </repeat> </template> <script> import wepy from 'wepy' //引入wepy export default class Message extends wepy.component {//创建组件实例 props = {//接收父组件参数 messageList: {// * 类型和默认值参数不能省略,组件会偶发性接收不到父组件传递的参数 type: Array, default:[] } }; } </script> <style scoped lang="less"> .topicInfo text { font-size: 12px; color: #666; } .topicBottom view { margin-right: 15px; } .msgList { background-color: #fff; margin-top: 7px; padding: 10px 15px; } </style> |
message-page.wpy:
|
0 1 2 3 4 5 6 7 8 9 10 11 12 13 14 15 16 17 18 19 20 21 22 23 24 25 26 27 28 29 30 31 32 33 34 35 36 37 38 39 40 41 42 43 44 45 46 47 48 49 50 51 52 |
<template> <view wx:if="{{!messageList.length}}" class="noData">暂无消息</view> <block wx:else> <message :messageList.sync="messageList"></message> <downLoad :show.sync="getListParam"></downLoad> </block> </template> <script> import wepy from 'wepy' import Message from '../components/message' import DownLoad from '../components/downLoad' import listMixin from '../mixins/list' import {connect} from 'wepy-redux' import {getMessageList} from '../store/actions' @connect({ messageList(state) { return state.reducer.messageList; } }, { getMessageList }) export default class MineMessages extends wepy.page { config = { navigationBarTitleText: '我的消息' }; components = { message: Message, downLoad: DownLoad }; data = {}; mixins = [listMixin]; methods = { getList(params) { let listParam = { messageType: 4 }; if (wx.getStorageSync('userId')) { this.getMessageList(Object.assign(listParam, params)); } else { wx.showToast({ title: '您还没有登录', icon: 'none' }); } } }; } </script> |
(2)mixins:Mixin 混合(公用的js)
混合可以将组件之间的可复用部分抽离,从而在组件中使用混合时,可以将混合的数据,事件以及方法注入到组件之中。混合分为两种:
- 默认式混合(data、components、events、自定义方法),即组件未声明的选项将混合对象中注入组件之中,组件已声明的选项将不受影响
- 兼容式混合(
methods响应事件、小程序页面事件),即先响应组件本身响应事件,然后再响应混合对象中响应事件(Vue则相反,先执行mixin中的函数, 再执行组件本身的函数)
eg:listMixin.js:
|
0 1 2 3 4 5 6 7 8 9 10 11 12 13 14 15 16 17 18 19 20 21 22 23 24 25 26 27 28 29 30 31 32 33 34 35 36 37 38 39 40 41 42 43 44 45 46 47 48 49 50 51 52 53 |
import wepy from 'wepy' export default class ListMixin extends wepy.mixin {//创建mixin实例 config = { enablePullDownRefresh: true,//开启下拉刷新,默认是关闭的 onReachBottomDistance: 10,//设置触发下拉刷新的底部距离 backgroundColor: "#eab010"//设置背景色 }; data = { getListParam: {//获取列表数据的通用参数 hasMoreData: true, loading: false, noMore: false, page: 1, limit: 10, } }; /** * 页面相关事件处理函数--监听用户下拉动作(下拉刷新) */ onPullDownRefresh() { wx.showNavigationBarLoading(); //在标题栏中显示加载 this.data.getListParam.page = 1;//下拉刷新时参数page=1 this.methods.getList(this.data.getListParam);//调用组件中的获取列表函数 setTimeout(() => { wx.hideNavigationBarLoading(); //完成停止加载 wx.stopPullDownRefresh(); //停止下拉刷新 }, 300) }; /** * 页面上拉触底事件的处理函数(上拉加载) */ onReachBottom() { if (this.data.getListParam.hasMoreData) { this.data.getListParam.page++;//每触发一次page++ this.data.getListParam.hasMoreData = false;//关闭可调用函数 this.data.getListParam.loading = true;//显示加载中...(自己写的底部加载中样式的组件) this.methods.getList(this.data.getListParam);//调用组件中的获取列表函数 setTimeout(() => { this.data.getListParam.loading = false;//关闭显示加载中...(自己写的底部加载中样式的组件) this.$apply();//强制渲染 }, 100); } else { this.data.getListParam.noMore = true;//显示加载完成(自己写的底部加载到底样式的组件) } }; onReady() { this.methods.getList(this.data.getListParam);//初始化请求页面数据 } } |
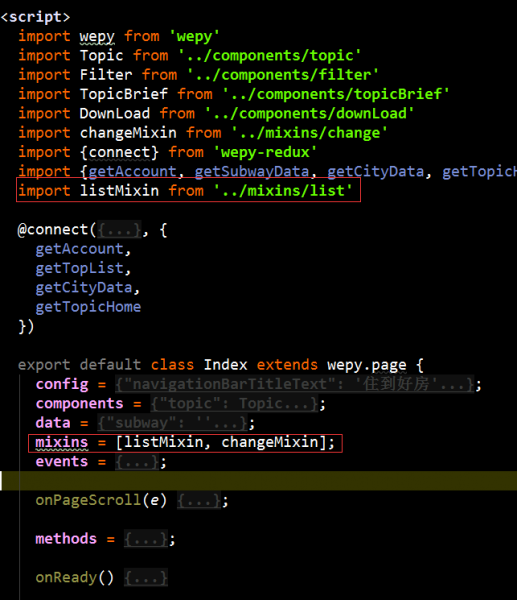
使用时引入然后注入到组件实例(最好放在data属性后,否则会偶发性报错),eg:
(3)页面page.wpy
Page页面实际上继承自Component组件,即Page也是组件。除扩展了页面所特有的config配置以及特有的页面生命周期函数之外,其它属性和方法与Component一致:
|
0 1 2 3 4 5 6 7 8 9 10 11 12 13 14 15 16 17 18 19 20 21 22 23 24 25 26 27 28 29 30 31 32 33 34 35 36 37 38 39 40 41 42 |
import wepy from 'wepy'; export default class MyPage extends wepy.page { customData = {} // 自定义数据 customFunction () {} //自定义方法 onLoad () {} // 在Page和Component共用的生命周期函数 onUnload() {} // 监听页面卸载 onReady() {} // 只在Page中存在的页面生命周期函数 onShow () {} // 只在Page中存在的页面生命周期函数,当小程序启动,或从后台进入前台显示 onHide() {} // 只在Page中存在的页面生命周期函数,当小程序从前台进入后台 config = {}; // 只在Page实例中存在的配置数据,对应于原生的page.json文件,类似于app.wpy中的config data = {}; // 页面所需数据均需在这里声明,可用于模板数据绑定 components = {}; // 声明页面中所引用的组件,或声明组件中所引用的子组件 mixins = []; // 声明页面所引用的Mixin实例 computed = {}; // 声明计算属性(详见后文介绍) watch = {}; // 声明数据watcher(详见后文介绍) methods = {}; // 声明页面wxml中标签的事件处理函数。注意,此处只用于声明页面wxml中标签的bind、catch事件,自定义方法需以自定义方法的方式声明 events = {}; // WePY组件事件处理函数对象,存放响应组件之间通过$broadcast、$emit、$invoke所传递的事件的函数 onPullDownRefresh(){} // 监听用户下拉动作 onReachBottom(){} // 页面上拉触底事件的处理函数 onShareAppMessage(){} // 用户点击右上角分享 onPageScroll(){} // 页面滚动 onTabItemTap(){} // 当前是 tab 页时,点击 tab 时触发 } |
(4)状态管理store(redux)
(5)app.wpy:小程序入口
app.wpy实例继承自wepy.app类,包含:config配置对象(对应原生的app.json文件,build编译时会根据config属性自动生成app.json文件)、globalData全局数据对象、自定义方法与属性、小程序生命周期函数。
在Page页面实例中,可以通过this.$parent来访问App实例。
|
0 1 2 3 4 5 6 7 8 9 10 11 12 13 14 15 16 17 18 19 20 21 22 23 24 25 26 27 28 29 30 31 32 33 34 35 36 37 38 39 40 41 42 43 |
<script> import wepy from 'wepy'; export default class extends wepy.app { config = { pages:[// pages定义当前小程序所有页面路径,让微信客户端知道当前你的小程序页面定义在哪个目录 'pages/index', 'pages/mine' ], window:{//window定义小程序所有页面的顶部背景颜色,文字颜色定义等。 "backgroundTextStyle": "light", "navigationBarBackgroundColor": "#fff", "navigationBarTitleText": "顶部标题", "navigationBarTextStyle": "black" }, tabBar: { selectedColor: '#ea9100',//底部导航字体选中时的颜色 list: [ { pagePath: 'pages/index',//导航页面路径(必须在pages中定义) text: '首页',//导航名 iconPath: 'img/index.png',//未选中的导航icon selectedIconPath: 'img/index1.png'//选中时的导航icon }, { pagePath: 'pages/mine', text: '我的', iconPath: 'img/mine.png', selectedIconPath: 'img/mine1.png' } ] }, }; onLaunch() {//初始化 console.log(this); } onShow(){}//当小程序启动,或从后台进入前台显示 onHide(){}//当小程序从前台进入后台 } </script> <style lang="less"> /** less **/ </style> |
(6)index.template.html:web页面的入口文件
2、project.config.json小程序项目配置文件
1.7.0 之后的版本会在根目录包含project.config.json,使用微信开发者工具–>添加项目,项目目录请选择项目根目录即可根据配置完成项目信息自动配置。
1.7.0 之前生成的代码包可能不存在project.config.json文件,建议手动创建该文件后再添加项目。project.config.json文件内容如下:
|
0 1 2 3 4 5 6 7 8 9 10 11 12 |
{ "description": "project description", "setting": { "urlCheck": true,//对应不检查安全域名选项,开启。 如果已配置好安全域名则建议关闭 "es6": false,//对应关闭ES6转ES5选项,关闭。 重要:未关闭会运行报错 "postcss": false,//对应关闭上传代码时样式自动补全选项,关闭。 重要:某些情况下漏掉此项也会运行报错 "minified": false //对应关闭代码压缩上传选项,关闭。重要:开启后,会导致真机computed, props.sync 等等属性失效。(注:压缩功能可使用WePY提供的build指令代替) }, "compileType": "miniprogram", "appid": "touristappid", "projectname": "Project name", "miniprogramRoot": "./dist" } |
3、wepy.config.js
|
0 1 2 3 4 5 6 7 8 9 10 11 12 13 14 15 16 17 18 19 20 21 22 23 24 25 26 27 28 29 30 31 32 33 34 35 36 37 38 39 40 41 42 43 44 45 46 47 48 49 50 51 52 53 54 55 56 57 58 59 60 61 62 63 64 65 66 67 68 69 70 71 72 73 74 75 76 77 78 79 80 81 82 83 84 85 86 |
const path = require('path'); var prod = process.env.NODE_ENV === 'production'; module.exports = { /*wpyExt:缺省值为'.wpy',IDE默认情况下不会对此文件类型进行高亮处理 除了进行前文代码高亮设置之外 还可以直接将相关文件的后缀名由.wpy修改为.vue,然后将此选项修改为.vue */ wpyExt: '.wpy', eslint: false, cliLogs: !prod, build: { web: { htmlTemplate: path.join('src', 'index.template.html'), htmlOutput: path.join('web', 'index.html'), jsOutput: path.join('web', 'index.js') } }, resolve: { alias: { counter: path.join(__dirname, 'src/components/counter'), '@': path.join(__dirname, 'src') }, aliasFields: ['wepy', 'weapp'], modules: ['node_modules'] }, /** compilers为1.3.1版本之后的功能,如果需要使用其它语法,请先配置compilers,然后再安装相应的compilers 目前支持wepy-compiler-less, wepy-compiler-postcss,wepy-compiler-sass、wepy-compiler-babel、wepy-compiler-pug 其他compiler持续开发中 */ compilers: { less: { compress: prod }, /*sass: { outputStyle: 'compressed' },*/ babel: { sourceMap: true, presets: [ 'env' ], /* plugins为1.1.6版本之后的功能 目前支持js压缩wepy-plugin-ugliyjs、图片压缩wepy-plugin-imagemin 其他plugin持续开发中 */ plugins: [ 'transform-class-properties', 'transform-decorators-legacy', 'transform-object-rest-spread', 'transform-export-extensions', ] } }, plugins: {}, /*在使用的地方先引入import wepy from 'wepy'; 然后wepy.$appConfig.属性名。eg:wepy.$appConfig.baseUrl*/ appConfig: { baseUrl:process.env.NODE_ENV === 'production'? 'https://api.a.com/' : 'https://api.a.com/dev/',// 运行 npm run dev命令时,域名为https://api.a.com/dev/,运行 npm run build时域名为https://api.a.com/ noPromiseAPI: ['createSelectorQuery'] } } if (prod) { // 压缩sass module.exports.compilers['less'] = {outputStyle: 'compressed'} // 压缩js module.exports.plugins = { uglifyjs: { filter: /\.js$/, config: {} }, imagemin: { filter: /\.(jpg|png|jpeg)$/, config: { jpg: { quality: 80 }, png: { quality: 80 } } } } } |
原文地址 https://my.oschina.net/wangnian/blog/2245468
